Monday, November 2, 2020

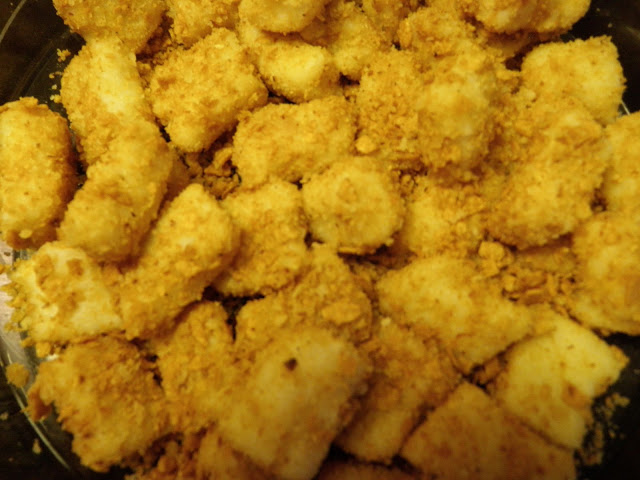
EGG “BOW TIE” COOKIES (EIR KICHLAH)


LESSON OBJECTIVES AND OUTLINE FOR TEACHERS

I. LESSON OBJECTIVES

A. The students will demonstrate their knowledge of proper cooking techniques by preparing the egg bow tie cookies; thereby demonstrating that they know how to:

  1. Use an electric mixer.
  2. Measure and combine ingredients.
  3. Roll out dough.
  4. Measure and cut the dough with a pastry cutter.
  5. Twist the rectangles into bow tie shapes.
  6. Bake the cookies in the oven and remove from the pan.

B. The students will demonstrate their knowledge of the significance of this recipe to Jewish cooking by completing the final Sample Test.

II. KITCHEN ORGANIZATION: TIPS AND TECHNIQUES

A. TIMING

1. If you are able to get your students busy as soon as they come in, it is not necessary to bake some of these ahead. There is usually enough time to make the dough, roll it out, shape it, and bake all within a 40-minute period so that the students can taste them.

2. If you have students that must be kept busy all the time, make a batch of dough ahead so that they can begin rolling and shaping right away while a few of the others are making the dough. The dough should be divided into workable-sized balls.

3. If there is a large class, a doubled batch will only yield about 6 or 7 workable balls, so you can either make a batch ahead, or have a small group prepare another double batch while the first is being rolled out by the rest of the students. Additionally, you could also assign two students to each ball.

B. TECHNIQUES

1. The dough is a better texture to work with if the eggs are beaten until light and fluffy as called for in the recipe.

2. If really pressed for time, the dough will roll out without the 5-minute resting period.

3. Use a ruler to cut the strips. Make the approximately one-inch strips by cutting on either side of the ruler. Cut into three-inch lengths by making the first perpendicular cut at one edge and then flipping the ruler over twice more before making the next cut.

4. These cookies should be rolled neither too thin, nor too thick so that they are easier to handle and bake uniformly. Check each student's dough before they begin to cut to make sure it is the correct and uniform thickness.

5. The cookies are particularly good when eaten warm from the oven. They also freeze very well if any are left over.

6. Usually after one class leaves there are little pieces of dough mixed in with the sugar all over the table. This all can be salvaged quickly by pushing everything together into a pile with a pastry scraper and then straining it through a sieve. The leftover dough pieces can be combined with the dough prepared by the next class, and the sugar is clean enough to spread out again and reuse for rolling.

7. This recipe is very durable and there seems to be almost no limit as to how many times the dough can be re-rolled and how much sugar can be incorporated.

III. FOOD FOR THOUGHT

A. Ask the students if they are familiar with these treats. Most Jewish bakeries sell them. Although they are very plain and light, they are usually better than the bakery ones because they are eaten so fresh.

B. These cookies are pareve. This would be a good opportunity to discuss the convenience of non-dairy desserts that could follow a meat meal. Also, when used for a snack, these cookies could be eaten without waiting a long time after a meat meal. Because meat takes a longer time to digest than dairy products, it is customary to wait before eating dairy products. For German and Western European Jews, this waiting time is three hours. For Eastern European Jews, it is six hours. The prevailing custom for Dutch Jews is 72 minutes.

MATERIALS EIR KICHLAH

  • 2 dozen large eggs
  • 1 bag granulated sugar
  • 1 c. vegetable oil
  • vanilla extract
  • 1 bag all-purpose flour
  • baking powder
  • non-stick spray
  • electric mixer
  • measuring cups
  • measuring spoons
  • plastic wrap
  • rolling pins
  • fluted pastry wheels
  • ruler
  • baking pans
  • metal spatula
  • rubber spatulas
  • pot holders
  • dishwashing liquid
  • dish towels
  • dish cloths

FOR THE STUDENTS:

EGG “BOW TIE” COOKIES (EIR KICHLAH)7

    “There are dozens of variations of these very popular light cookies. Some are made with a stiff, rolled dough, others with a softer dough that is ‘dropped’ onto the baking sheet. Some use copious amounts of oil, others use none at all. Some call for baking powder, others don’t. Some are barely sweet, others are very sweet. Some are cut into simple squares, rectangles, or circles, others are cut into fancier diamonds or twisted into bow ties.

    “With their Yiddish name, these treats are obviously Ashkenazic. But Sephardic Jews of Turkish and Greek origins use an almost identical dough to make ring-shaped cookies which are coated with sesame seeds. The latter are sometimes called biscochos de huevo, which translates the same as eir kichlah…The cookies are light, pleasantly but not excessively sweet, and easy to make. (This recipe may be doubled; roll it out in two batches for best results.) The method for biscochos de huevo is also included below.”

  • 2 large eggs
  • 1/4 c. sugar (plus more for rolling and topping)
  • 3-1/2 T. vegetable oil
  • 1/4 t. vanilla extract (optional)
  • 1-3/4 c. all-purpose white flour, preferably unbleached
  • 1 t. baking powder

DOUBLED:

  • 4 large eggs
  • 1/2 c. sugar
  • 7 T. vegetable oil
  • 1/2 t. vanilla extract
  • 3-1/2 c. flour
  • 2 t. baking powder

1. Use an electric mixer to beat the eggs with the 1/4 c. sugar for several minutes until very light and fluffy; then beat in the oil and vanilla (if used).

2. Stir in the flour and baking powder and mix until combined. If the dough is very sticky, add a little more flour.

3. Gather the dough into a ball and wrap it in plastic wrap. Let it rest for 5 to 10 minutes.

4. Using extra sugar, instead of flour, to keep the dough from sticking, roll out the dough to about a 1/4-inch thickness. Sprinkle more sugar on top and gently press it in with the rolling pin.

5. Using a fluted pastry wheel, cut the dough into small squares, rectangles, or diamonds. To make bow ties, cut the dough into rectangles about 1 inch wide by 2-1/2 to 3 inches long. Carefully twist each rectangle twice in the center so that the sugared surface faces upward. Pinch gently into shape in the center.

6. Transfer the cookies to a non-stick spray-coated baking sheet, keeping them at least 1/2 inch apart.

7. Bake the cookies in a preheated 350-degree oven for about 20 minutes, or until they are lightly browned. Remove them from the sheet and cool them on a wire rack.

Makes about 3 dozen small, flat cookies or about 2 dozen bow ties.

Variation: Biscochos de Huevo (Sesame Ring Cookies)

    Increase the sugar in the dough to 1/3 cup (or up to 1/2 cup for sweeter cookies). Use floured hands to shape the dough into 1/2-inch-diameter ropes. Cut the ropes into 4-inch-long sections and pinch the ends of each section together to form a ring. Beat 1 egg with 1 t. each of cold water and sugar. Dip the top surface of each ring into the egg mixture and then into hulled sesame seeds. Place the rings on a greased or non-stick spray-coated baking sheet with the seeds facing upward. Bake as directed for eir kichlah. 

----------------------------------------------

    7Recipe and text from Gloria Kaufrer Greene The Jewish Holiday Cookbook: An International Collection of Recipes and Customs (Published in the United States by Times Books, a division of Random House, Inc., New York, and simultaneously in Canada by Random House of Canada Limited, Toronto, 1985), pp. 55-57.

HAMANTASHEN FOR PURIM


LESSON OBJECTIVES AND OUTLINE FOR TEACHERS

1. LESSON OBJECTIVES

A. The students will demonstrate their knowledge of proper cooking techniques by preparing
the hamantashen; thereby demonstrating that they know how to:
  1. Cream butter and sugar in an electric mixer.
  2. Measure and combine ingredients.
  3. Roll out dough and cut into rounds.
  4. Make lekvar filling for hamantashen.
  5. Form dough circles around filling into triangular shapes.
  6. Bake cookies and remove from pan.
B. The students will demonstrate their knowledge of Purim by completing the final Sample Test.

II. KITCHEN ORGANIZATION: TIPS AND TECHNIQUES

A. TIMING

1. The dough for this recipe must be well-chilled to roll out properly and so must be made ahead of time. It will keep for several days in the refrigerator if necessary.

2. Allow the students to prepare one batch of dough so that they can see how it is done.

3. While some of the students are preparing the dough, others can be preparing the lekvar filling. The honey-walnut filling can be made ahead if desired as it must be cool to use. It can be skipped for purposes of the classroom and made by the students at home if they wish to try it.

4. Have several students rolling out and re-rolling the dough while others cut and remove the rounds to pans, still others fill each circle, and some form the circles into triangles. These jobs can be rotated so that each student gets to try each part of the operation.

B. TECHNIQUES

1. Fillings such as lekvar (prune), poppy seed, almond, cherry, etc. can be purchased at most supermarkets already prepared and ready to use. If you are making several batches of dough with several classes, it is nice to have a variety of fillings.

2. Demonstrate the method of turning up the edges of the circle to form a triangle before allowing the students to begin.

3. If time allows, roll the scraps together after cutting circles, wrap in plastic wrap and freeze for a few minutes before re-rolling. They will roll out more evenly when they are cold.

4. Edges cannot be pinched together if filling gets between them so try not to overfill the centers.

5. Plastic yogurt cups and orange juice cans make good cookie cutters.

6. This dough can be re-rolled and floured a good number of times before becoming "tough" so it is pretty sturdy to use with novices.

7. Use only “Wondra” flour for this recipe. It is a granulated flour which does not need sifting and nothing else has the same texture.

8. The pans need only be lightly floured and not greased for this recipe.

III. FOOD FOR THOUGHT

A. Ask the students if they have ever sent or received a mishloach manot package and how they felt about it if they did. What kinds of goodies were in it? How was it packaged? Who sent it and who received it? If they could choose, what are their favorite items to receive as food gifts?

B. Hamantashen can be frozen nicely and can be baked in quantity, frozen, stored, and sent to a shelter or nursing home as mishloach manot when enough have been prepared by the class.

C. A Purim Se’udah can be thought of as a “theme party” with the theme being masquerade, joke-telling, and general clowning. What sort of foods would be in keeping with this theme? What sort of decoration for the table?

MATERIALS LIST FOR HAMANTASHEN
  • 2 c. sugar
  • 2 sticks (1 cup butter)
  • 1 doz. eggs
  • 1/2 t. salt
  • 3-1/2 c. Wondra flour
  • all-purpose flour for rolling and dusting
  • 2-1/2 t. baking powder
  • 2 t. vanilla
  • 2 oz. orange juice
  • fillings (lekvar, poppy seed, cherry, etc.)
If making lekvar filling:
  • 1/2 c. dark raisins
  • 1 T. honey
  • cinnamon
  • electric mixer
  • small bowls
  • measuring cups
  • measuring spoons
  • plastic wrap
  • rolling pins
  • cookie cutters
  • baking pans
  • mixing spoons
  • 2 batches of dough made ahead
  • honey-walnut filling (optional)

FOR THE STUDENTS:

HAMANTASHEN—PURIM

    During ancient times in Persia, an evil minister named Haman schemed and connived his way into a position of enormous influence with the King. When King Ahasueras decreed that all must bow down to him, another advisor who was a Jew named Mordechai, refused. Haman used this opportunity to accuse the Jews of being disloyal and persuaded the king to set a date for the extermination of all the Jews in the country. The date was to be set by the casting of “lots” or Purim in Hebrew. Unknown to both Haman and King Ahasueras was the fact that the beloved Queen Esther was a Jew and a cousin to the condemned Mordechai. She prepared a feast for the king and, at the risk of her own life, pleaded with the king to spare her people’s lives. This made the king realize what a danger Haman had become and so the king had him hanged on the gallows that Haman had prepared for Mordechai. On the date that had been scheduled for the destruction of the Jews (the thirteenth of Adar), the king allowed them to take vengeance on the enemies who wished to destroy them. On the following day, there was a great celebration of the victory, but in the walled capital city of Shushan, the fighting continued for one more day and so the celebration was delayed. As a result, it is customary for Jews in walled cities to celebrate Purim on the fifteenth of the month of Adar, rather than the fourteenth as elsewhere. This celebration is called Shushan Purim, but in reality, the celebration is such a major event in Israel that most people celebrate both days.
    The holiday is marked by a carnival and parade called Ad’lo’yada which comes from the Talmudic suggestion that one should drink enough wine so that he “doesn't know the difference” between the names Mordechai and Haman during the reading of the Megillah, or scroll which tells the story of Queen Esther. Children and adults dress in masquerade. A festive meal is eaten called a Purim Se’udah during which merriment and joke-telling are the order of the day. It is also a time to distribute gifts of food called mishloach manot in Hebrew to friends, relatives, and the poor.
    Triangular-shaped cookies called hamantashen are a traditional treat among the Ashkenazim, but how they came to be associated with Purim is obscure. One explanation is that they already existed in the form of mohn tashen, meaning poppy-seed pockets. The similarity of the name of these cookies may have caused them to be renamed Haman tashen as a remembrance of the bribes that lined the evil Haman's pockets. In Israel, they are known as oznai Haman, or Haman’s ears.

HAMANTASHEN
  • 1 c. sugar
  • 1/2 c. butter
  • 3 eggs
  • 1/2 t. salt
  • 3-1/2 c. Wondra flour
  • 2-1/2 t. baking powder
  • 1 t. vanilla
  • 2 oz. orange juice
  • Fillings (Lekvar, Honey-Walnut, Cherry, Poppy Seed)
1. Cream butter with sugar in bowl of electric mixer.

2. Add eggs one at a time.

3. Add salt, flour and baking powder.

4. Add vanilla and orange juice.

5. Mix together well and chill at least two hours in refrigerator.

6. Divide into four portions and roll out on a well-floured surface until about 1/8-inch thick.

7. Cut with a large thin-edged cup or drinking glass or round cookie cutter making cuts close together to avoid re-rolling wherever possible.

8. Place on a floured cookie sheet or baking pan.

9. Place a scant tablespoonful of filling in the center.

10. Turn up opposing edges of the circle and pinch together at the corner where they meet.

11. Bring up remaining edge of the circle and pinch together at the corners where it meets the first two edges to form a triangle.

12. Bake at 400 degrees for 8-12 minutes.

13. Re-roll scraps and proceed again from Step 7.

Makes 35-38 cookies.

Fillings for Hamantashen

Lekvar Filling
  • 1-lb 1-oz. jar lekvar
  • 1/2 c. dark raisins
  • 1 T. honey
  • 1 T. sugar
  • 1/4 t. cinnamon
  • 1 tsp. vanilla
1. Stir these all together and use as filling for hamantashen.

Honey-Walnut Filling
  • 3/4 c. honey
  • 1 c. coarsely chopped walnuts
  • 1/4 c. sugar
  • 1/3 c. fine dry bread crumbs
  • 1/2 t. grated orange rind
1. Place the honey, walnuts, sugar and bread crumbs in a saucepan.

2. Stir constantly over low heat until the mixture becomes thick. Scrape the bottom as you stir to prevent sticking.

3. Remove from heat and stir in grated orange rind.

4. Cool before using.

KASHA AND BOW TIES (KASHA VARNISHKES)

Click here for additional photos.

LESSON OBJECTIVES AND OUTLINE FOR TEACHERS

I. LESSON OBJECTIVES

A. The students will demonstrate their knowledge of proper cooking techniques by preparing kasha and bow ties; thereby demonstrating that they know how to:

  1. Peel an onion and chop it using a food processor.
  2. Prepare bouillon.
  3. Cook and drain pasta.
  4. Measure and combine ingredients.
  5. Combine kasha with eggs and brown the kasha in a pan.
  6. Simmer the mixture until it is done.

B. The students will demonstrate their knowledge of the background and tradition of kasha and bow ties by completing the final Sample Test.

II. KITCHEN ORGANIZATION: TIPS AND TECHNIQUES

A. TIMING

1. No preparation of food is needed before beginning this lesson; however, it is a good idea to start water boiling for the noodles and bouillon before class.

2. The work is divided between two groups and ideally should work out in such a way that when Group 1 has the onions fried to the proper stage, Group 2 has the kasha ready to go into the pan.

3. When the kasha is browned, the bouillon should be ready to go into it.

4. During the 20 minutes while the bow tie noodles are boiling, the kasha should be cooking so that both finish together and can be combined and served.

B. TECHNIQUES

1. A little more or less onion will not significantly affect the recipe.

2. The bouillon cubes can be crushed before adding to the boiling water, or they can be dropped in first, allowed to soften somewhat, and then mashed with the back of a wooden spoon.

3. Browning kasha can be a little tricky since it is brown to start with. When the grains look well cooked and dry and separate easily rather then clumping together from the egg, the bouillon can be added.

4. The bouillon should be added carefully as it will sizzle when it first contacts the hot pan.

5. Use a wooden spoon or silicon spatula to stir the kasha and bow ties together as a metal spoon tends to break up the noodles.

6. Check the kasha midway through the cooking process to make sure it is simmering and has not stuck to the bottom of the pan.

III. FOOD FOR THOUGHT

A. If most of your students are from an Ashkenazic background, they very often are familiar with this dish as something that only their bubbies make, and they usually either love it or they hate it. Ask about variations that are traditional in their families. What types of main courses are kasha and bow ties served with in their families?

B. Another place where your students might have tasted this dish is at a Jewish summer camp. Encourage them to taste the kasha and bow ties they have prepared in the classroom even if they think they won 't like it, because often, in institutional settings, things do not taste the same as when they are homemade and fresh.


MATERIALS FOR KASHA AND BOW TIES
  • 1 large onion
  • vegetable oil
  • 2 eggs
  • 1 box coarse kasha
  • 1 stick margarine
  • 2 chicken bouillion cubes
  • 1 1-lb. bag bow-tie shaped noodles
  • food processor
  • 6 qt. meat pot for cooking kasha
  • 2 qt. meat pot for boiling water bouillion
  • 8 qt. meat pot for boiling noodles
  • measuring cups
  • large mixing spoons
  • colander
  • large spoons
  • small mixing bowls
  • small fork
FOR THE STUDENTS:

KASHA AND BOW TIES (KASHA VARNISHKES)

    “Although the word ‘kasha’ can be used for almost any cereal, to Russian and Polish Jews it almost invariably means toasted buckwheat groats. Buckwheat (which, botanically, is not a grain, but a type of herb) is an extremely hearty plant that prefers a cool climate. Therefore, kasha was relatively plentiful in the shtetls of Eastern Europe, and it was eaten daily. Imaginative cooks used it in every possible dish, including porridge, knishes, kreplah, blintzes, strudel, and cholent.
    “A side dish called kasha varnishkes was often served on Hanukkah and other holidays. It is still a favorite of many Ashkenazic Jews… As a bonus, kasha is very nutritious, with generous amounts of protein, iron, B vitamins, and fiber.”8
  • 1 c. chopped onion
  • 4 T. vegetable oil or chicken fat
  • 2 eggs
  • 1 box coarse kasha (buckwheat groats)
  • 1/2 stick margarine
  • 2 chicken bouillon cubes
  • 1 1-lb. bag bow-tie shaped noodles
Group 1
1. Peel and chop onion in food processor.

2. Heat oil in pan and sauté onions on medium heat until soft and translucent.

3. Boil 4-1/4 cups water and dissolve bouillon cubes.

4. Fill a large pot about 3/4 full with water. Bring to a boil. Pour in bow tie noodles and cook according to package directions. (About 20 minutes)

5. Start cleaning up.

6. When noodles are cooked, drain and stir carefully into kasha.

Group 2

1. Beat eggs lightly with a fork.

2. Pour kasha into a small bowl. Add eggs and mix together.

3. Add kasha mixture to fried onions in pan and sauté on moderately high heat, stirring constantly, until grains begin to turn a darker brown and are separate, about 5 minutes.

4. Add 4 cups bouillon prepared by Group 1 slowly.

5. Turn heat to simmer and add 1/2 stick margarine.

6. Stir, cover, and allow to simmer 20 minutes.

7. While kasha is cooking, start cleaning up.

    Kasha varnishkes can be finished and put in a baking pan to be frozen. When ready to use, defrost and warm, gently, covered in 350-degree oven. 

---------------------------------------------
8Text from Gloria Kaufer Greene, The Jewish Holiday Cookbook: An International Collection of Recipes and Customs (Published in the United States by Times Books, a division of Random House, Inc., New York, and simultaneously in Canada by Random House of Canada Limited, Toronto, 1985), p. 178.

Sunday, November 1, 2020

CHEESE KNISHES AND POTATO KNISHES


LESSON OBJECTIVES AND OUTLINE FOR TEACHERS

I. LESSON OBJECTIVES

A. The students will demonstrate their knowledge of proper cooking techniques by preparing the knishes; thereby demonstrating that they know how to:

  1. Measure and combine ingredients.
  2. Peel, dice, and sauté an onion.
  3. Mix, handle, knead, and cut dough.
  4. Roll out strudel dough to a very thin square.
  5. Fill the dough and roll up jelly-roll style.
  6. Cut the filled dough with the side of the hand.
  7. Pinch the edges of the filled dough together to form the rounded shape.
  8. Glaze the knishes using a brush.
  9. Bake the knishes until golden brown.
B. The students will demonstrate their knowledge of the origins and significance of knishes by completing the final Sample Test.

II. KITCHEN ORGANIZATION: TIPS AND TECHNIQUES

A. TIMING

1. Since it is necessary to bake knishes for 35 minutes, a batch must be baked ahead if the students are to taste the finished product. They are easily frozen, if convenient, and rewarmed in the oven. Knishes made by the first class can be tasted by a second and so on.

2. Production is speeded up somewhat by dividing the class into two groups, each producing a separate filling and working with its own ball of dough.

B. TECHNIQUES

1. The dough can be made by stirring together the ingredients with a wooden spoon, but if there is an electric mixer available, the initial combining of ingredients is easier with the mixer.

2. An easy way to handle the onion is to cut off both ends first, which facilitates peeling. Onions that have been refrigerated and are cold do not cause as much eye irritation. Slice the onion in half so that you will have a flat end against the table when dicing.

3. Make sure hands, rolling pins and surfaces are well-floured when working with dough, but be careful not to incorporate too much flour.

4. The dough will snap back like a rubber band at first, but with patience and a little care as it thins, it becomes less elastic and is very nice to work with.

5. Try to use the filling in such a way that dough and filling are used up at the same time. If the dough is thin enough, and therefore the square large enough, there should be about three rows of filling on each square.

6. Demonstrate the technique on the first filled roll and then let each student cut and form a knish with his own hands.

7. A 1-1/2 to 2-inch clean paint brush is handy for applying glaze.

III. FOOD FOR THOUGHT

A. Two fillings are presented here, but there are many variations of fillings that could be used to fill a knish. The more common ones are liver, kasha, and rice. Recently, knishes filled with spinach, broccoli, mushrooms and other vegetables have been making an appearance in combination with various types of cheeses and herbs. Discuss with the students what combinations are interesting to them and which ones are their traditional favorites.

B. The Mardi Gras celebration in New Orleans gets much media attention in the United States, but the large Purim celebration in Tel Aviv gets none. It might be interesting to compare the similarities and differences of the two celebrations.

MATERIALS FOR CHEESE KNISHES AND POTATO KNISHES

  • farmer's cheese (2 c.)
  • eggs (4)
  • sugar
  • salt
  • all-purpose flour (4 c.)
  • vegetable oil (1/2 c.)
  • baking powder
  • non-stick spray
  • instant mashed potato buds (1-1/3 c.)
  • onion (1 small)
  • butter (1 stick)
  • milk (1/3 c.)
  • electric mixer (optional)
  • small mixing bowls
  • mixing spoons and forks
  • 6-inch vegetable knife
  • 2-qt. pot
  • measuring cups
  • measuring spoons
  • small frying pan
  • rolling pins
  • scissors
  • clean 1-1/2 to 2-inch paint brush
  • baking pans
  • dish towels
  • dish cloths
  • dishwashing liquid
  • potholders

FOR THE STUDENTS:

CHEESE KNISHES AND POTATO KNISHES

    Although knishes have entered mainstream American cuisine insofar as they can be found in most supermarkets with a delicatessen section and are available frozen as hors d’oeuvres almost anywhere frozen foods can be bought, they appear in Jewish cookbooks in the form that is most familiar to Americans only rarely. They appear to be uniquely of German or Russian Ashkenazic origin. Similar recipes for dough wrapped in various ways around a filling and baked are known by many different names in both Ashkenazic and Sephardic cultures, such as: borekas, kreplach, and pierogen. However, the classic recipe that is familiar to those of us in the United States, where they were a staple at every bar and bat mitzvah and Jewish wedding, produces a rounded patty-shaped crusty dough which encases a savory filling of potato with fried onions, liver, kasha, rice, or cheese. This type of knish is produced by the recipe below.
    Since the flour used to make the strudel-type dough for these knishes is prohibited on Passover, another type of knish is made which uses mashed potatoes in the dough itself for this holiday. This mashed potato dough is wrapped around the filling. These Passover potato knishes are the most common ones found in Jewish recipe books. They are also delicious and a recipe for this type of potato knish can be found in the Passover Feasts course section of this curriculum.
    In all its forms, the knish is very convenient street food and is sold by vendors in Tel-Aviv during the Ad’lo’yada carnival that takes place during Purim. In families where knishes are traditionally made, they are considered traditional fare for a Purim seudah, the festive meal that is enjoyed by family and friends during this holiday.

KNISHES

Cheese Filling
  • 2 c. farmer's cheese
  • 1 egg
  • pinch sugar, salt

Dough
  • 3 c. all-purpose flour
  • 2 eggs
  • 1/2 c. vegetable oil
  • 1/2 t. baking powder
  • 3/4 c. lukewarrn water
  • Non-stick spray

Potato Filling
1-1/3 c. instant mashed potato buds
1/2 t. salt
1 small onion
2 T. butter
1/3 c. milk
1-1/3 c. water

Glaze
1 beaten egg
1 T. oil

Group 1—Cheese Filling and Glaze

1. Mix cheese filling by combining ingredients in small bowl, breaking up cheese curds with a fork.

2. Prepare glaze by combining ingredients in a separate small bowl.

Group 2—Potato Filling

3. Dice onion and sauté in butter in small frying pan over medium heat. Set aside.

4. Bring water, milk, and salt to a boil in small pot over high heat.

5. Remove from heat and add potato buds stirring just until combined. Let stand 30 seconds to absorb moisture and fluff with a fork.

6. Stir in sautéed onions and butter.

Group 1—Dough and Cheese Knishes

7. Mix all dough ingredients together in bowl. (You can use an electric mixer at this stage.)

8. Empty out onto a well floured surface. Knead into a ball with floured hands.

9. Cut dough in half and knead each ball separately again.

10. Give one ball to Group 2 and roll the other out very thin on a floured surface to a square shape.

11. Spray very lightly with non-stick spray.

12. Place cheese filling one inch from top of dough in a strip about 1-1/2 inches wide along top.

13. Take top of dough and roll over filling, jelly roll fashion. Then roll twice more, and cut off with scissors from the rest of the dough.

14. Repeat process until all dough and filling are used up.

15. Pinch ends of dough together.

16. Cut strips of filled dough at 1-1/2-inch intervals with the side of your hand, pushing the piece away from the others slightly while pressing down.

17. Pinch to seal each end of knish. (The motion of your hand in cutting should just about seal the dough all by itself and a rounded shape results from patting the corners in your palm.)

18. Place on non-stick spray-coated baking pan and brush with glaze.

19. Bake at 325 degrees until golden brown approximately 35 minutes.

Group 2—Potato Knishes

20. Follow steps 10 through 19 with potato filling.

These freeze very well and can be reheated in the oven at 350 degrees.
Makes about 40 small knishes. 20 Cheese - 20 Potato

CHEESE KREPLACH


LESSON OBJECTIVES AND OUTLINE FOR TEACHERS

I. LESSON OBJECTIVES

A. The students will demonstrate their knowledge of proper cooking techniques by preparing the kreplach; thereby demonstrating that they know how to:

  1. Measure and combine ingredients.
  2. Use a food processor to make dough. (Optional: The dough can be made by making a well in the center of the flour and putting the eggs there. Then the flour is gradually incorporated into the eggs.)
  3. Chop ingredients using food processor.
  4. Use a pasta machine (Optional: The dough can be rolled out thinly with a rolling pin.)
  5. Measure and cut 3-inch squares from rolled out dough using a ruler and sharp knife.
  6. Fill, seal, and crimp edges of squares.
  7. Cook kreplach in boiling water.
  8. Drain and make sauce for kreplach.

B. The students will demonstrate their knowledge of Shavuot and the relationship of this dish to the holiday by completing the final Sample Test.

II. KITCHEN ORGANIZATION: TIPS AND TECHNIQUES

A. TIMING

1. Preparation of the dough and filling takes very little time (about 10 minutes, if things go smoothly) so it is possible, if there is an hour available, to complete the recipe from the beginning to the tasting without previous preparation. If an hour is not available, however, it is recommended that a small quantity be prepared ahead of time and frozen so that if time runs short, these kreplach can just be dropped into boiling water for 20 minutes as the students are preparing a quantity of their own.

2. Another method to shorten the time is to prepare the dough ahead of time so that some students can immediately begin rolling and cutting while others prepare the filling.

B. TECHNIQUES

1. If the food processor bowl is small, there may not be room for the dough to form a ball on top of the steel knife blade. Just process until eggs and flour are well combined and push the dough together with your hands.

2. A pasta machine is not necessary to prepare kreplach, and certainly, bubbie did this without the benefit of one, but if it is available, it produces a thin and silky pasta that bubbie could never match. In addition, it is very appealing to the “gadget people” who always like to learn how to use a new piece of equipment. It is a very easy piece of equipment to operate and is practically self-explanatory.

3. If rolling by hand, roll out as thinly as possible.

4. Keep surfaces which come in contact with kreplach well-floured to prevent them from sticking.

5. Water in which the kreplach are cooked should not be boiling vigorously as this would tend to break the kreplach apart.

6. The grated cheese can be purchased already grated, or can be grated using the grating disk of the food processor. You can use whatever type of cheese the students would prefer.

7. Toss kreplach in sauce with a wooden spoon or silicon spatula to avoid breaking them apart.

III. FOOD FOR THOUGHT

A. The introduction to this lesson teaches that Shavuot has many different levels of meaning attached to its celebration. The richness of our history has enabled us to enjoy many of our holidays with several levels of meaning. Holidays that often had their origins in simple agrarian practices became symbolic of major historical events that affected our lives. Pesach also is a holiday which has taken on many levels of meaning during our long and complicated history. Although the original reasons for the celebration may have become irrelevant to us, we can learn, as others did before us, to imbue the holiday with a symbolism that makes it relevant to our times and situation. Ask the students which parts of the Shavuot celebration might have relevance for their own lives and for ways in which it might become relevant if they don’t find it to be so.

B. The students may be more familiar with kreplach in the form of frozen ravioli. Many of the dishes that are distinctly Jewish also have parallels in other cultures. Wherever we traveled over the millennia, we adapted local recipes to our own distinct dietary laws. What other foods are indigenous to a particular country that we have adapted to conform to our dietary laws?

MATERIALS FOR CHEESE KREPLACH

  • all-purpose flour
  • 5 eggs
  • 1 lb. farmer's cheese
  • 4 T. sour cream
  • 1 onion
  • parsley
  • dill
  • salt and pepper
  • butter
  • grated cheese
  • food processor
  • pasta machine
  • small bowls
  • measuring cups
  • measuring spoons
  • plastic wrap
  • metal ruler
  • pastry cutter wheel
  • small sharp knives
  • metal fork
  • 6-8 qt. dairy pot
  • colander
  • plastic forks and plates
  • dishwashing liquid
  • dishtowels
  • dish cloths
  • pot holders

FOR THE STUDENTS:

SHAVUOT

    Shavuot is one of the three major pilgrimage holidays along with Pesach and Sukkot. In ancient times, Jews from all surrounding lands made the pilgrimage to the Holy Temple in Jerusalem to offer the first fruits of the harvest season. For this reason, Shavuot is also known by the names Hag Ha’Bikurim, meaning Festival of the First Fruits, and Hag Ha’Katzir, meaning Festival of the Harvest. In later times, as the Jews of Palestine became a more urban people, the holiday lost its relevance to the lifestyle of the people and by Talmudic times, it had come to be celebrated, also, as the time of the giving of our law, or Zeman Matan Torahtenu. Evidently, the giving of the Torah on Mount Sinai coincided on the calendar with the time of the agrarian holiday and so it became a time of affirmation of Jewish faith, as well as a harvest holiday. Because of this association, it has become a festival during which teenagers celebrate confirmation, a practice begun by the Reform Movement and adopted by Conservative and Some Orthodox congregations.

    Shavuot is intimately tied to Pesach in time by the counting of the Omer. In fact, the Talmud refers to Shavuot only as Atzeret, meaning conclusion, as the rabbis felt that Shavuot was truly the conclusion of the Passover season. There are precisely fifty days from the first day of Pesach to the first day of Shavuot. An omer is a measure of barley which was harvested each day and brought to the Temple until there were 49 of them (seven weeks). For this reason, Shavuot in additional to being known as “Weeks,” is also known as Pentecost (a Greek word meaning fifty).

    Three-cornered, cheese-filled kreplach are eaten by many Ashkenazic Jews on Shavuot because the number ‘three’ has several connections with the holiday. The Law is three-fold, comprising Torah, Prophets, and Writing. It was given to Moses, the third child born of his parents, on the sixth (two times three equals six) of the third month of the Hebrew calendar. Moses brought it to the Jewish people, who were made up of three groups: Kohan, Levite, and Israelite.

    “Cheese varenikes are almost identical to cheese kreplach, the only difference being that the dough is cut into circles, not squares, and folded into half-moons.”9

CHEESE KREPLACH (Triangular Noodle Dumplings)

Dough

  • 2-1/2 - 3 c. unbleached all-purpose flour
  • 4 eggs
  • Savory Cheese Filling
  • 2 7-1/2 to 8 oz. packages (about 1 pound) farmer cheese
  • 2 T. commercial sour cream
  • I large egg
  • 1 T. finely minced onion
  • 2 - 3 sprigs fresh parsley
  • 2 - 3 sprigs fresh dill
  • 1/2 t. salt and dash pepper

To serve:

  • 4 T. melted butter
  • Grated cheese to taste

1. Place 2-1/2 c. flour in food processor bowl. Add the 4 eggs. Process with steel knife just until the mixture forms a ball on top of the steel knife.

2. Wrap dough in plastic wrap and refrigerate for 10 minutes.

3. Without washing bowl, put in a small piece of onion, the parsley, the dill, salt, pepper, and the egg. Process until finely chopped.

4. Add farmer cheese and sour cream to bowl and process for just a few seconds until cheese is just broken up and mixture is uniformly combined. Do not over-process.

To Use Pasta Machine:

5. Divide dough into 4 equal pieces. Shape each one roughly into a sausage-type shape.

6. Flatten one end slightly for feeding into pasta machine and feed through on sheet-feed roller on widest setting—No. 8. Keep table well floured beneath feed area of pasta machine.

7. Decrease setting width to No. 6 and feed through again.

8. Decrease setting width to No. 5 and feed through again.

9. Decrease setting width to No. 4 and feed through again.

10. By now there will be a long, narrow strip of thin dough. Cut a straight line with a ruler and sharp knife along one edge of the strip. Measure several points along strip 3 inches up and lay ruler along these points. Cut another straight line the length of the strip. Remove excess dough from edges and reserve. Using the ruler, cut as many 3-inch squares as possible from the strip of dough.

11. Keep working area well-floured to prevent sticking. Place a scant tablespoonful of filling in center of square.

12. Wet two perpendicular edges of the square with a finger dipped in a small bowl of water.

13. Fold opposing edges over into a triangle and carefully crimp edges closed with a fork.

14. Place with spatula onto an ungreased, floured baking pan to dry somewhat.

15. Repeat from Step 6 with remaining three pieces of dough.

16. Combine remaining scraps of dough and continue the procedure until all dough has been used up.

-----------------------------------------------------------------------------------------------------------------

To Roll by Hand:

5. Divide dough in half and roll out as thinly as possible on a well-floured surface.

6. Measure and cut into 3-inch squares and proceed from Step 11 above.

7. Repeat with second half of dough.

-----------------------------------------------------------------------------------------------------------------

17. At this point, the kreplach can be frozen on the baking sheets and then placed in plastic bags in the freezer for future use. (Do not defrost. Drop frozen kreplach directly into boiling salted water.) Otherwise, they can be boiled immediately and served.

18. To serve immediately, drop into a large (6-8 qt.) pot of rapidly boiling, salted water. Bring water back to a boil on high heat. Once the water begins to boil again, turn heat down somewhat so that the water is kept simmering, but not vigorously boiling. Boil uncovered for 15–20 minutes. Frozen kreplach may take the full time. Taste a piece to test doneness and drain in colander.

19. Melt butter in pot from which the kreplach were drained. Toss kreplach in melted butter gently to coat, sprinkle with grated cheese, and serve hot.

Makes approximately 4 dozen kreplach.    

    Kreplach can be filled with almost any type of ingredient so long as the filling is fairly thick and finely chopped. Meat kreplach made with leftovers of cooked meats or chicken that is ground finely and mixed with herbs and spices are especially delicious and traditional served in soup.

-----------------------------------------------

    9Text from Gloria Kaufer Greene, The Jewish Holiday Cookbook: An International Collection of Recipes and Customs (Published in the United States by Times Books, a division of Random House, Inc., New York, and simultaneously in Canada by Random House of Canada Limited, Toronto, 1985), p. 354.

Wednesday, October 28, 2020

LUKSCHEN KUGEL


LESSON OBJECTIVES AND OUTLINE FOR TEACHERS

I. LESSON OBJECTIVES

A. The students will demonstrate their knowledge of proper cooking techniques by preparing the kugels; thereby demonstrating that they know how to:

  1. Cook, drain, and rinse noodles.
  2. Caramelize sugar and oil.
  3. Measure and combine ingredients.
  4. Break, beat, and add eggs.
  5. Turn a kugel into a greased baking pan and bake.
B. The students will demonstrate their knowledge of the traditions regarding kugel by completing the final Sample Test.

II. KITCHEN ORGANIZATION: TIPS AND TECHNIQUES

A. TIMING

1. As kugels take a very long time to bake, it is necessary to prepare them ahead of time so that the students can taste. Actual preparation time is fairly short.

2. Kugels freeze extremely well and can be frozen in a partially-baked state, defrosted, and finished at a later time as well. Do not freeze unless they have been baked somewhat firm.

3. This lesson includes recipes for two kugels and the class is divided into two groups, each making its own kugel.

4. Have water boiling at the beginning of class.

B. TECHNIQUES

1. Keep an eye on the student that is stirring the caramelizing sugar in oil. The oil and sugar don't actually combine and the splashing of oil when stirring could do much damage. Also, once the sugar has begun to color, it darkens very quickly and should be watched carefully so that it doesn't burn. It is very important to have the noodles cooked, drained, rinsed, and ready to add as soon as the caramel begins to darken.

2. Watch carefully when adding the noodles to the hot oil mixture. It is a good idea to do this in a roomy pot because the oil will sizzle and sputter as the wet noodles are added.

3. It is an integral part of the Kugel Yerushalayim that the pepper be freshly ground. Do not make it with pre-ground pepper. It will not taste the same. In addition, the students enjoy taking turns using the pepper grinder.

III. TEACHING TECHNIQUES

A. Kugel Yerushalayim is a favorite recipe of the Hasidim of Mea Shearim in Jerusalem. This is a very unique community and because it is so ultra-orthodox, many of the problems that arise between secular and religious Israelis originate in this place. Women have been attacked for being dressed immodestly and for acting improperly when visiting this neighborhood. Movie theaters have been vandalized for opening on Shabbat, and kiosks selling pulpy magazines and newspapers have been bombed. A discussion of Mea Shearim might explore the students’ values regarding whether a neighborhood has the right to dictate a moral code to anyone who visits it. Would they tolerate what they would consider immorality on the streets outside their homes? In neighborhoods in the United States, people have banded together to get rid of drug dealers on their streets. Where should the line be drawn between sensitivity for a person 's moral code and infringement of that moral code on another person's rights?

B. On the lighter side, how many different types of kugels are the students familiar with? What different kinds of ingredients could be added to a kugel to make it interesting?

C. One kugel is milchige and one pareve. To observe kashrut, it is necessary to have both kinds so that one can choose the appropriate type to accompany a meal. Discuss how a milchige kugel might be part of different dairy menus and how a pareve kugel might be part of different meat menus.

MATERIALS LIST FOR KUGELS

  • 1-1b. fine egg noodles
  • 1-lb. medium egg noodles
  • 1/2 c. vegetable oil
  • sugar
  • salt
  • pepper mill with black peppercorns
  • 2 dozen eggs
  • 1 qt. milk
  • 1 pt. sour cream
  • small container creamed cottage cheese
  • non-stick spray
  • 1 foil lasagna pan
  • 1 foil roaster pan
  • 6 qt. dairy pot
  • 8 qt. dairy pot
  • mixer
  • 2 colanders
  • large spoons
  • measuring cups
  • sample kugels - milchige and Yerushalayim
  • serving knife
  • aluminum foil
  • dishwashing liquid
  • dishcloths
  • dishtowels
  • paper plates
  • plastic forks
***************************************************************

FOR THE STUDENTS:

LUKSCHEN KUGEL
(NOODLE PUDDING)

Lukschen kugel is a traditional Shabbat dinner dish and can be served either hot, or at room temperature. Milchige, or dairy lukschen kugel is second only to cheese blintzes as a favorite dish during Shavuot. Kugel Yerushalayim is a recipe that was excerpted from a chapter on foods to celebrate Yom Ha’Atzmaut and Yom Yerushalayim. “This peppery kugel (a Yiddish word adopted into the Israeli vernacular) has become a trademark of the Hasidim in Mea Shearim—an ultra-Orthodox area of Jerusalem—and of nearby areas. In fact, preparation and distribution of the delicious noodle pudding are the means of support for a few of its older residents. Jerusalem kugel is served at many Israeli weddings and bar mitzvah celebrations, and even at state functions. The unusual recipe calls for caramelizing sugar in oil, to give the kugel a golden color and a subtly sweet taste that contrasts perfectly with the pepper.”10

KUGEL YERUSHALAYIM11
 (GROUP 1)

  • 1 lb. fine egg noodles
  • 1/2 c. vegetable oil
  • 1/4 c. sugar
  • 1 t. salt
  • 3/4 tsp. freshly ground black pepper
  • 4 large eggs, beaten
  • non-stick cooking spray

1. In an approximately 6-quart pot, cook the noodles in boiling water according to the package directions. Drain them in a colander. Then rinse them with cool water and let them drain very well.

2. Dry the pot well; then put the oil and sugar into it. Stir the sugar in the oil over medium-low heat (they will not actually combine) for 5 to 10 minutes, or until the sugar melts and caramelizes, and turns a dark golden brown—the color of caramel candy.

3. Immediately add all the well-drained noodles to the pot, while stirring them very well, so the oil and caramelized sugar are evenly distributed. If any of the sugar solidifies into chunks, continue stirring the noodles over medium-low heat until the sugar melts. Remove the noodles from the heat and stir in the salt and pepper. Then let the noodle mixture cool for 10 to 15 minutes or until it is lukewarm.

4. Stir the beaten eggs completely into the noodles. Then turn out the mixture into a lasagna size pan that has been sprayed well with non-stick cooking spray.

5. Bake the kugel in a preheated 325-degree oven for 1-1/4 to 1-1/2 hours, or until the top is golden and very crisp. Let the kugel cool for about 5 minutes before cutting it. 

MILCHIGE LUKSCHEN KUGEL 
(GROUP 2)

  • 1-lb. medium egg noodles
  • 8 eggs
  • 3 c. milk
  • 1/2 pt. sour cream
  • 3 T. creamed cottage cheese
  • 1 c. sugar

1. In an approximately 6-qt. pot, cook the noodles in boiling water according to the package directions. Drain them in a colander. Then rinse them with cool water and let them drain very well.

2. While they are cooking, beat together the eggs, milk, sour cream, cottage cheese, and sugar.

3. Mix all ingredients together, and fold into a small roaster size pan which has been sprayed well with non-stick cooking spray.

4. Bake at 350 degrees for 1-3/4 hours, or until the top is golden and very crisp. Let the kugel cool for about 5 minutes before cutting it. 

-----------------------------------------------------

10Text from Gloria Kaufer Greene, The Jewish Holiday Cookbook: An International Collection of Recipes and Customs (Published in the United States by Times Books, a division of Random House, Inc., New York, and simultaneously in Canada by Random House of Canada Limited, Toronto, 1985), p. 307.

11Ibid Recipe for Kugel Yerushalayim.

Tuesday, October 27, 2020

MANDELBREAD (TWICE-BAKED ALMOND COOKIES)

LESSON OBJECTIVES AND OUTLINE FOR TEACHERS

I. LESSON OBJECTIVES

A. The students will demonstrate their knowledge of proper cooking techniques by preparing the mandelbread; thereby demonstrating that they know how to:

  1. Grate orange rind.
  2. Juice an orange.
  3. Measure and sift flour.
  4. Beat eggs with an electric mixer.
  5. Cream sugar and oil in an electric mixer.
  6. Measure and combine ingredients.
  7. Pat dough into loaf shapes on a baking sheet.
  8. Slice baked loaves and rebake the cookies.

B. The students will demonstrate their knowledge of the Yiddish origins of these cookies
and the holiday for which they are particularly appropriate by completing the final Sample Test.

II. KITCHEN ORGANIZATION: TIPS AND TECHNIQUES

A. TIMING

1. Make one batch ahead and leave in loaf form. This way, the students can have the experience of slicing the baked loaves, finishing the toasting part in the oven, and can still have time to taste the finished product. The cookies freeze very well if they need to be done far ahead.

2. Students finish the first set of loaves and then proceed to prepare the second batch of dough for the oven. If there are several classes, the loaves baked by the previous class can be sliced and sampled by the succeeding ones.

3. Several of the steps of the recipe can be proceeding at the same time. For example, the orange can be grated and juiced by one student while another is measuring and sifting flour and another is beating eggs and creaming in sugar and oil.

4. Another way to deal with the recipe for a rather large class would be to assign each student a number and let him/her perform that particular task.

B. TECHNIQUES

1. A very small, fine grater is very handy to have for grating various citrus peels quickly and easily into many recipes. The only inconvenience is cleaning the peel out of the tiny holes. I store a cheap toothbrush along with the grater for cleaning out the last little bit of peel, and then when washing the grater, the toothbrush can be used again to clean it thoroughly. The flavor the fresh peel adds in certain recipes is far superior to that provided by the dehydrated peel that can be purchased. If you should decide to use prepared rind and juice, use 1 T. of dehydrated rind and 1/4 c. of orange juice.

2. Make sure there is room in the measuring cup for the orange juice to expand when the baking soda is added.

3. Use a large metal spoon when spooning dough onto baking sheet and clean it off periodically with a rubber spatula using each against the other to remove the dough that sticks.

4. Use the spatula against the bottom of the pan to help push the dough sideways into the proper shape before using hands.

5. Lift loaves carefully off the pan onto a cutting board with metal spatula before slicing and use a sharp, serrated knife to slice the loaves to avoid breaking off the edges.

III. FOOD FOR THOUGHT

A. “The story of Yiddish is closely tied to the story of Ashkenazi Jewry... The German Jews who migrated eastwards retained their language and developed it in relative isolation, until it became a distinct Germanic language, enriched by dialects of its own and with a uniquely Jewish resonance. Subsequent movements spread the language far beyond its historic homeland, and by 1939, it was estimated that there were over 10 million Yiddish speakers dispersed over the entire globe. The Holocaust and rapid linguistic assimilation have drastically reduced that figure, but Yiddish continues to be cherished by its devotees, and has recently begun to undergo a modest revival. The award of the Nobel Prize for literature to Isaac Bashevis Singer in 1978... drew attention to a continuing Yiddish literature which reposes on a long and significant tradition.”12 A consciousness-raising session about the nature of the Yiddish language might be in order with this lesson. With what Yiddish words are the students familiar, and how do they feel about using these words in their everyday language?

B. Do your students know any Yiddish-speaking people? What kind of background is the person from? How do they feel about the language when they hear it spoken by other people?

C. There are many variations of this recipe that can be made for Passover using cake meal, or matzoh meal, and potato starch. Since extracts containing grain alcohol are not permitted during Passover, other adaptations are necessary. Discuss with your students how our dietary laws influence our adaptations of recipes. Our dietary laws are what distinguish Jewish cuisine from other types of cuisine. Even though we have adapted our cooking to each of the lands we have inhabited, we have retained our unique cuisine because of our dietary laws and the symbolism we attribute to the many foods that are traditional for our holidays.

MATERIALS LIST FOR MANDELBREAD

  • 3 eggs
  • 2 c. sugar
  • 3/4 c. oil
  • 1 t. baking soda
  • 1 navel orange
  • 4-1/2 c. all-purpose flour
  • 1 t. almond extract
  • 1 t. vanilla extract
  • 1 c. chocolate chips
  • 1 tsp. cinnamon
  • small grater
  • small knives
  • long sharp knife
  • juicer
  • sifter or sieve
  • electric mixer
  • measuring cups
  • measuring spoons
  • 2-11" x 17" jelly roll pans
  • metal spatula or turner
  • large mixing spoon
*******************************************************

FOR THE STUDENTS:

MANDELBREAD (TWICE-BAKED ALMOND COOKIES)

These light and appealing cookies appear in almost every Ashkenazic cookbook. They are known by many variations in spelling depending on how much Yiddish is included and the way it is transliterated into English. Some of these names are: mandlebroit, mandelbrot, mondlebrot, and mandelbread. There are as many variations in the recipe as there are in the names. Several characteristics, however, are common to all of them. The dominant flavoring always comes from nuts, usually almonds. Mandlen is the Yiddish word for almonds. Also, the dough is usually patted into long loaf shapes by hand to be baked. After this baking, the loaves are sliced and the slices laid out on the baking sheet to be baked again individually so that the cookies have a light, toasty consistency. They are usually pareve so that they can be eaten any time the desire for them strikes, and they last for a long time stored in an airtight tin at room temperature. They also freeze beautifully and take almost no time to defrost. If they do get a little stale, they can be retoasted in the oven and will be just as delicious. Almost any small tidbit can be added to the dough before the first baking so that there are as many variations as there are likes and dislikes. Some other additions to the recipe below might be: candied fruit; chopped dried fruit, such as apricots, dates, or peaches; raisins; nuts of any kind; flavored chips, such as peanut butter, or mint chocolate chip; your favorite candy bar chopped up, or any combination of these.

Another name for this type of cookie is kamish bread, or komish bread and seems to be a more accurate name for cookies that do not have a dominant almond flavor but are made the same way. In English, they are also called rusks instead of cookies to indicate that they are toasted and crunchy.

Whichever variation you prefer, the cookies are eaten all year around, but are considered particularly appropriate for Sukkot, and lend themselves beautifully for serving in the Sukkah because they are filled with fruits and nuts, symbols of the harvest.

CHOCOLATE CHIP MANDELBREAD

  • 3 eggs
  • 1-1/2 c. sugar
  • 3/4 c. oil
  • 1 t. baking soda
  • 1 navel orange - juice and rind
  • 4-1/2 c. all purpose flour
  • 1 c. chocolate chips
  • 1 t. vanilla
  • 1 t. almond extract
  • 1 t. cinnamon in ½ c. sugar

1. Leaving orange whole, grate orange part of rind against small grater into a dish.

2. Cut orange in half and extract juice by pressing halves against a juicer and reserve.

3. Sift flour.

4. Beat eggs in electric mixer until frothy.

5. Cream in sugar and oil.

6. Dissolve baking soda in orange juice making sure that there is room in the cup for the juice to expand.

7. Add juice mixture to egg, sugar, and oil mixture.

8. Add almond and vanilla extracts, and grated rind.

9. Mix in flour, a cup at a time.

10. Stir in chocolate chips.

11. Divide dough into three parts and form into three loaves. This can be done by spooning large dollops of dough in three rows crosswise on an 11" x 17" ungreased jelly roll pan. When the dough is evenly divided, pat with your hands into loaf shapes approximately 3" wide x 10" long, thicker in the center and thinner at the edges. The dough is not as sticky as it appears to be on the spoon and will not stick to your hands if you just pat it lightly until smooth.

12. Sprinkle tops with cinnamon sugar.

13. Bake on rack in top third of the preheated 350-degree oven approximately 20 minutes, or until golden brown.

14. Cool slightly and cut loaves into diagonal 1/2-inch thin slices.

15. Arrange slices back on baking sheet, adding an additional baking sheet to accommodate all the slices.

16. Return to oven and toast 8 minutes.

17. Remove from oven and flip each cookie over and toast an additional 8 minutes on the other side.

Makes approximately 4 dozen cookies.

ANISE/LEMON/PINE NUT MANDELBREAD

  • 2 lg. lemons juice and rind
  • 1 c. pine nuts
  • 2 t. anise seeds
  • 1 T. anise extract
  • plain sugar on top
Follow steps above for chocolate chip mandelbread.

------------------------------------------------

12 N.R.M. de Lange, et.al. Atlas of the Jewish World (Oxford, England: Equinox Ltd., 1985), p. 120.


POTATO LATKES

LESSON OBJECTIVES AND OUTLINE FOR TEACHERS

I. LESSON OBJECTIVES

A. The students will demonstrate their knowledge of proper cooking techniques by preparing potato latkes; thereby demonstrating that they know how to:

  1. Break and whisk eggs with salt and pepper.
  2. Carefully heat vegetable oil to the proper temperature observing safety practices.
  3. Peel potatoes.
  4. Grate potatoes to the proper consistency using a food processor.
  5. Drain and squeeze liquid from grated potatoes.
  6. Carefully spoon potato batter into hot oil.
  7. Brown and turn the latkes over in the hot oil carefully.
  8. Remove the latkes from the oil properly.
  9. Drain the latkes properly.

B. The students will demonstrate their understanding of the techniques involved in working with potatoes and oil and the relationship of this recipe to the holiday of Hanukkah by completing the Sample Test at the end.

II. KITCHEN ORGANIZATION: TIPS AND TECHNIQUES

A. TIMING

1. It is not necessary to do any preparation before beginning the recipe in class.

2. Try to set up a rotating production line so that as one group is peeling potatoes, another is getting the eggs ready, and another is watching the heating of the oil. As the potatoes are being grated, drained, and squeezed, the group that readied the eggs can be rinsing the utensils for the next batch and then can begin peeling potatoes again as the first potato peeling group gets the eggs ready. The group with the hot oil can fill into this triangle after the first batch of latkes are fried so that everyone tries his hand at all aspects of the production of the latkes.

B. TECHNIQUES

1. It is absolutely imperative that the teacher be with the hot oil station at all times. The teacher should supervise as the work stations are being set up and explain what the students are to do, but his or her attention should be focused on observing safe practices when dealing with the hot oil. If the physical set-up of the kitchen or the size of the class requires the teacher to be a distance from the rest of the work stations, it would be advisable to have an assistant present to allow the teacher to focus in on keeping oil from splashing or spilling and causing injury.

2. A swivel blade vegetable peeler is very handy for peeling potatoes and causes less accidental injury than a knife.

3. It is convenient to peel the potatoes at the sink so that they can be rinsed easily when necessary.

4. Idaho potatoes are used because they are less watery than other types of potatoes and therefore give a better consistency in this recipe.

III. FOOD FOR THOUGHT

A. Foods fried in oil during Hanukkah are symbolic of the miracle of the oil which occurred when the Temple in Jerusalem was re-dedicated by Judah the Maccabee and his followers following its desecration three years earlier by the followers of the Syrian king, Antiochus. When the sacred Temple Menorah was rekindled during the re-dedication, only enough undefiled oil for one day could be found, but it continued to bum for eight days and nights until more purified oil could be obtained. Most students are familiar with lighting wax candles to celebrate the holiday, but may not be familiar with the type of hanukkiah that burns small pots of oil. If a hanukkiah of this type cannot be obtained to demonstrate, it can be fabricated by filling a pyrex glass bowl with water and pouring a thin (1/8-inch) coating of vegetable oil on top. The oil will float to the top as you pour. Cut some I-inch squares of heavy duty aluminum foil and poke a small hole in the center of each. Place a very short length of heavy cotton twine halfway through each hole and float each square on the oil: Light the wicks that protrude from the top of the foil squares with a match. They will burn by feeding on the oil. Ask the students how long they think the oil would burn before being consumed by the flames. How much oil would be needed to burn for 8 days?

B. Potato latkes are of Eastern European origin and were originally fried in rendered goose fat because early winter was the time when the geese which had been fattened all summer and fall were slaughtered. It is very rare to see potato latkes fried in goose fat today because of our understanding of the relationship between highly saturated fats and heart disease. How have other traditional Jewish dishes changed and evolved because of scientific discoveries about good nutrition?

MATERIALS FOR POTATO LATKES

  • 3 doz. eggs
  • 10 lbs. Idaho potatoes
  • 1 gallon vegetable oil
  • salt
  • pepper
  • sour cream
  • applesauce
  • 3 2-qt. bowls
  • wire whisk
  • food processor with grating disk and steel knife
  • 2 10-inch skillets
  • deep fat thermometer
  • several potato peelers
  • rubber spatulas
  • colander
  • metal teaspoons
  • metal forks
  • slotted spoons
  • roll of paper towels
  • small bowls for dipping applesauce and sour cream
  • dish cloths
  • dish towels
  • dishwashing liquid
  • potholders

****************************************************

FOR THE STUDENTS:

POTATO LATKES

Potato latkes are really very easy to make, but the secret to making good ones is in understanding the techniques involved in working with potatoes. I think that most people would agree that potato latkes are well-made when they are white and crispy, but when I catered, I encountered people who preferred them gray and soggy, “like Bubbie used to make.” These people had Bubbies who were not very good cooks, but nostalgia has a lot to do with what people like and dislike. Many recipes for potato latkes call for adding flour and baking soda to absorb the liquid that accumulates when the potatoes are grated. This recipe is a little different. No filler is added because the liquid is drained away.

Potatoes start to turn color as soon as they are peeled, so don't peel them until you have everything else ready. Cold water helps to slow the process of turning color, so as each potato is peeled, drop it into some cold water. Grating the potatoes makes them turn dark even faster than peeling and the liquid that accumulates when they are grated turns dark the fastest of all. Obviously, the secret to having white and crispy potato latkes is speed and organization. Therefore, try not to make a bigger batch of grated potatoes than you can fry immediately in one or two pans. Have the oil hot when the potatoes are ready so that they don't have a chance to sit around and turn color while waiting for the oil to heat up. If you need to make a lot of them, as I did when I was catering, just keep making fresh batches as you finish frying the previous batch. Don't try to peel and grate all the potatoes at one time and then have them sitting around turning gray while they wait to be fried. Once the latkes are fried and drained on paper towels, they freeze beautifully and can be reheated in a 350-degree oven, uncovered, in a single layer.

For this class, and if you want to make them hors d'oeuvres size, just use a heaping teaspoon to put them into the oil. If you want the regular size, use a larger spoon. The same techniques work if you want to make a potato kugel. Heat a small amount of oil in a pan in the oven and double the recipe for potato latkes. When the oil is the proper temperature, carefully pour in the potatoes and bake at the highest temperature your oven allows without broiling until the kugel is well browned.

Potato latkes are probably the most traditional of all the Hanukkah dishes, especially if you are of Eastern European descent. Long ago, Potatoes were very inexpensive and easy to grow and they kept well during the cold winter months. When oil was scarce and expensive, the potato latkes were fried in schmaltz, the rendered fat from geese or chickens, and served with gribbenes, the cracklings of skin that were left when the fat was rendered.

MINI POTATO LATKES

  • 2 large eggs
  • 1/2 t. salt
  • a few grindings of black pepper
  • 3 large or 4 small Idaho potatoes
  • (always use Idaho as the texture of the potatoes is important)
  • Vegetable oil for frying

1. Whisk the eggs with the salt and pepper in a large bowl and set aside.

2. Pour enough oil into a large skillet to come about 3/4-inches up the side. Begin heating the oil to 350 degrees on a deep-fat thermometer. KEEP AN EYE ON THE TEMPERATURE OF OIL. OIL THAT IS OVERHEATED CAN CATCH FIRE AND BURN DOWN YOUR HOUSE! Once the oil is the correct temperature, if you are not putting food into it, take it off the heat temporarily.

3. Peel potatoes and drop into cold water as they are finished.

4. Grate potatoes through the grating disk of the food processor.

5. Turn out into a bowl and replace the disk with the steel knife.

6. Pour grated potatoes back into bowl and pulse approximately 8 times to chop a little finer. This process gives almost the same consistency as the ones that are grated by hand.

7. Pour potatoes into colander in the sink and squeeze them with your hand to remove as much of the liquid as possible.

8. Pour potatoes into the egg mixture and stir.

9. When oil has reached the correct temperature (the first latke should sizzle as soon as it touches the oil), slide portions of the batter into it by the heaping teaspoonful.

10. Fry until the bottoms and edges begin to turn golden brown, then flip over and fry the top side the same way. While you are waiting, rinse everything that has come in contact with the potatoes in COLD water. Hot water cooks the potato starch onto the dishes and utensils and makes them harder to wash.

11. Once all the dishes and utensils are rinsed, you may begin preparing another batch (from Step 1) if you wish, so that when one batch comes out, another is ready to go in. The oil may be used for at least three batches. After a while it starts looking burnt and starts to foam up when you add the potatoes. If this happens and you plan to make more, start with a new pan of oil.

12. When the latkes are golden brown on both sides, remove them from the oil with a slotted spoon, allowing the excess oil to drip back into the pan. Drain on paper towels.

13. Serve hot with applesauce or sour cream or both. 

SLISHKAS (POTATO DUMPLINGS)

Click here for additional photos.

LESSON OBJECTIVES AND OUTLINE FOR TEACHERS

I. LESSON OBJECTIVES

A. The students will demonstrate their knowledge of proper cooking techniques by preparing slishkas; thereby demonstrating that they know how to:

  1. Prepare instant mashed potatoes.
  2. Measure and combine ingredients.
  3. Beat eggs.
  4. Knead dough.
  5. Roll dough with the hands into ropes.
  6. Cut dough ropes into lengths.
  7. Boil dough.
  8. Drain dumplings.
  9. Prepare a crumb coating.
  10. Toss the slishkas in the buttered crumbs.

B. The students will demonstrate their knowledge of the relationship of this dish to Jewish cooking by completing the final Sample Test.

II. KITCHEN ORGANIZATION: TIPS AND TECHNIQUES

A. TIMING

  1. No preparation is required ahead of time for this recipe.
  2. There is a bit of a wait while the slishkas are boiling. If you wish to keep the students occupied during this time, you can save the preparation of the crumbs for this time and grind them in the food processor, or have them begin cleaning up.

B. TECHNIQUES

  1. It is not necessary to use a mixer for this recipe. If one is available, it can be used.
  2. Keep surfaces well-floured to prevent sticking.
  3. Toss the slishkas in the crumb coating with a wooden spoon to keep from breaking them up.

III. FOOD FOR THOUGHT

A. This recipe is not heavy with symbolic meanings as are some of the others included in this course, but slishkas are remembered in certain quarters with a fondness and nostalgia particularly appropriate to memories of Bubbie’s kitchen. They belong to a category of old fashioned, homey, comfort foods that are rarely prepared in this age of frozen french fries. Ask your students if they have any special memories to share about foods prepared in their bubbies’ kitchens that may not be familiar to an assimilated American family. It may be a dish that they hated, too. Some other dishes not covered in this course that may fall into this category are: schav, petcha, gefilte fish, kishka, gribenes, to give but a few examples.

MATERIALS FOR SLISHKAS

  • 2 boxes instant potato flakes or buds
  • boiling water
  • vegetable oil
  • salt
  • 1 dozen eggs
  • all-purpose flour
  • 2 sticks butter
  • stale bread for bread crumbs
  • potato chips
  • mixer
  • measuring cups
  • measuring spoons
  • knife
  • 6 to 8 qt. pot with steamer insert and lid
  • large skillet
  • mixing spoons
  • pot holders
  • serving bowl
  • small pot for boiling water
  • food processor
  • dishwashing liquid
  • dishtowels
  • dishcloths
******************************************************************

FOR THE STUDENTS:

SLISHKAS

Years ago, a favorite buffet selection at Ashkenazic Bar Mitzvahs was slishkas. They are buttery, crumb-coated potato dumplings that are served as a side dish. A very similar type of dish is probably more familiar and is the Italian favorite, potato gnocchi. Gnocchi, which means knuckles, are made from a similar dough that is pressed against a rough surface such as a coarse grater before they are cooked so that sauces will cling to them. Making slishkas is much more fun because it is reminiscent of that time in kindergarten when you made long snakes out of clay or play dough by rolling pieces between your fingers and the table. Every skill comes in handy eventually!

I’ve substituted instant potatoes for the mashed potatoes with which these are traditionally made because I find that the finished product is just about the same. Also, slishkas have always been coated with bread crumbs, but when I have leftover stale potato chips, I usually grind them up in the food processor and add them to leftover bread crumbs or matzoh meal when I am breading something. Since this is a potato dough, the potato chips give a nice, but untraditional crunch to the slishkas. You can also use corn flake crumbs, or any other type you like.

Dough

  • 2 c. instant potato flakes or buds
  • 2 c. boiling water (or very hot tap water)
  • 2 T. vegetable oil
  • 1/2 t. salt
  • 2 large eggs
  • 2 c. all-purpose white flour (preferably unbleached)

Alternately using Real Mashed Potatoes: 

  • 4 cups seasoned mashed potatoes with onions and butter
  • 2 extra-large eggs
  • 2 cups all-purpose white flour (preferably unbleached)

Coating

  • 2 T. butter, margarine, or vegetable oil
  • 1 c. fine bread crumbs
  • 1 c. finely ground potato chip crumbs

1. Put the potato flakes or buds into a large mixing bowl and add boiling water. Mix well to make stiff mashed potatoes.

2. Stir in the oil and salt and let mixture come to lukewarm stirring occasionally.

3. Beat in the eggs until they are completely combined.

4. Add the flour gradually while mixing at lowest speed.

5. Lightly knead the dough in the bowl for 1 to 2 minutes, or until it is springy. (At this point, if necessary, the dough can be covered well with plastic wrap and set aside for a short while, or it can be refrigerated overnight.)

6. Keeping the dough, your hands, and the surface well floured, roll the dough into ropes that are one-half to one-quarter inches thick.

7. Cut each rope with a floured knife into 1 to 1-1/2-inch-long pieces.

8. Gently drop the pieces of dough into a large pot of salted boiling water.

9. After they rise to the top, boil them, uncovered or partially covered for 4 to 8 minutes, or until they are chewy and firm, but not doughy. (Overcooking can make them gummy.)

10. Immediately remove them with a slotted spoon and drain them well. (If you use a steamer insert in your pot, you can just lift it out and let the slishkas drain in the insert.)

11. While the slishkas are cooking, prepare the crumb coating by melting the butter in a large skillet over medium heat and stirring in the crumbs until completely coated and hot.

12. Toss the slishkas in the buttered crumbs and serve. 

Welcome to Bubbie’s Kitchen

     An integral part of Jewish life in America involves the preparation of foods that are eaten by the family together in an atmosphere of ...